


Onwards to Chile! I will miss Bolivia, the country provided me with some of the biggest highlights of my trip. I will not miss the gas station scamming that goes on in this country though.
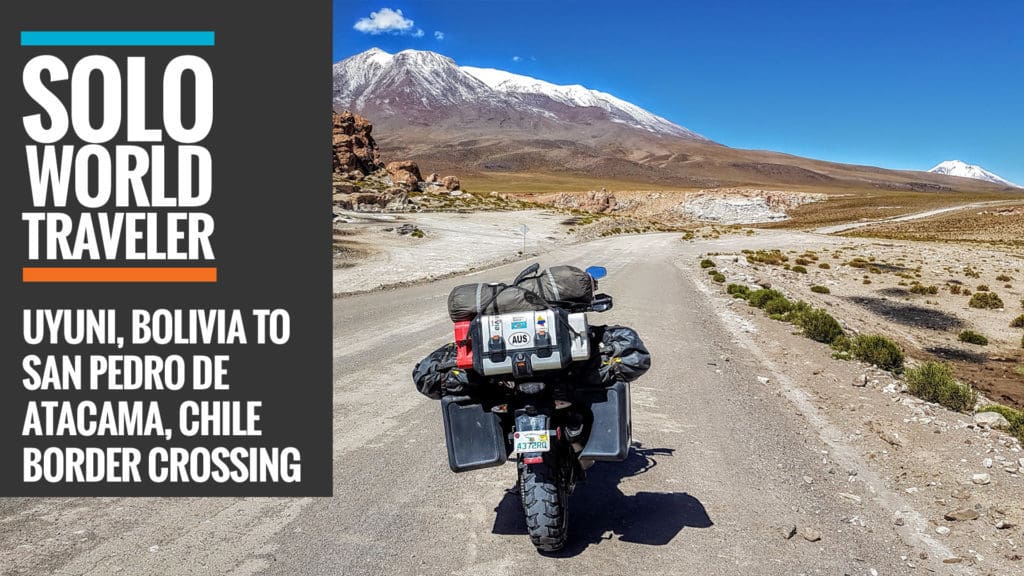
The 223 km trip to the border would be 95% off-road, with stops along the way in San Cristóbal (where you must get gas) and swept along high altitude valleys for most of the way through mainly sunny but freezing cold conditions.
Thankfully there was little to no traffic on this road as I was able to go pretty fast most of the way on the hard packed surface. The only time you need to take care is through towns, which often turns the road into a bog. I would not like to ride this road when it was wet though as it would be as slippery as hell.
There were also only a smattering of towns along the way, Culpina K, Alota and Cerro Tomasamil, the border town is called Estacion Avaro (Border Town), Ollagüe (Border Town Chile), Lasana, San Francisco de Chiu Chiu, Calama and onto my final destination in San Pedro de Atacama, Chile.
Although the trip total was 340 miles (545 kilometers) and took me over 12 hours including border time. It was a little exhausting, and I was looking forward to a nice ride into Chile.
Leaving Bolivia
- As you approach the border, you will go through the tiny town of Estación Avaroa, Bolivia, and it springs up on you quite quickly after a left turn.
- You should stop right outside yellow and black fence before the border and park your bike on the before the fence.
- Immediately to your right will be immigration building. Go inside and get stamped out and hand in your Bolivia tourist card and pay 15
Bolivianos. This was a quiet frontier crossing, there was only one person in immigration, and it only took 10 minutes. - Next, go to Aduana building (blue building on the other side of the road). There will be a security guy there, and he will ask a few questions (Spanish only), and you will wait in line until he calls you to go to his desk.
- This takes only a few minutes (if no-one else is there)
- Total Time was 15 minutes and 15 Bolivianos ($3 USD)
Entering Chile
- As you drive through gates out of Bolivia, you will need to ride about 2 miles to get to Chile Border Crossing.
- You need to stop at first at the big long building on the left.
It is confusing because it does say Aduana on the building, but stop there,
enter the building, and you will see a number of windows. Wait for someone to arrive. I parked right outside immigration a bit further down, where they had security - Once you get inside you will need to complete a tourist card to get stamped into the country
- You also get to say how long you will be in the country (I said 90 days as you weave in and out of Chile on your way to Patagonia and back to Buenos Aires). The girl was a complete ass and made my life miserable, but I just smiled and was nice.
- Now go back around to the front of the building and down about 50 meters to get your import permit (Aduana) where you parked the bike, give all pertinent papers and copies (passport photo page, title, registration, and drivers license, tourist card).
- The guy/girl enters all data into the computer, asks how long you are staying and completes a form
- After about another 10 minutes I got my import papers for 90 days
- Now they will inspect your vehicle – one of the few border crossings they do this on. After taking my bags apart, and another 10 minutes I was on my way – Now into Chile!
- Total Time was 90 minutes and $0 (it would have been quicker if two buses hadn’t arrived before me at immigration)
Notes: You have to get insurance, which can be purchased online for Bolivia, Chile, Argentina, Uruguay, Paraguay, and Brazil. You just need to send her all your vehicle details and which countries you want. Here are her details below (send her an email ) she will require.
Insurance for Motorbike Argentina, Chile, Bolivia, Uruguay, Paraguay, and Brazil
I can do an insurance of civil liability for the vehicle. It covers Argentina, Chile, Bolivia, Uruguay, Paraguay, and Brazil. To pass the insurance price, I need if you can send me a photo of the
vehicle
To get insurance, she needs the following information:
- First and Last Name
- Passport Number
- Date of Birth
- Period you need to be covered (days)
- Vehicle information: Brand, Model, Year, VIN Number, Registration number.
Gisela María Speiser
Av. Roque S. Peña 651 3*”56″
(1035) Capital Federal
Tel/Fax 0054 11 4326-3647/2611
Celular 11 15 4176-9382
gisela@speiserseguros.com.ar
www.speiserseguros.com.ar
Total Cost Both Borders: $4 USD (I am Australian Citizen)
San Pedro de Atacama, Chile
San Pedro de Atacama is a town set on an arid high plateau in the Andes mountains of northeastern Chile. It has dramatic surrounding landscape incorporates desert, salt flats, volcanoes, geysers and hot springs. The Valle de la Luna in the nearby Los Flamencos National Reserve is a lunar-like depression with unusual rock formations, a huge sand dune, and pink-streaked mountains.
Takha Takha Hotel
I arrived during a deluge in absolutely freezing conditions. The staff was very friendly and I was able to park my bike securely. The rooms were very dated, but they were comfortable.
The Internet was useless, basically, you had to be near the office or pool as they haven’t discovered you can actually get WiFi working throughout the whole property for a little investment.
I say investment because hotels that do it property also make a lot more money from tourists than their competitors. There is just no excuse now for tourist hotels not to have good Wifi.
It was actually a reasonable place, but very expensive for what it offers (and doesn’t).
It is right in the heart of the small town. So it is an easy walk to a bar/restaurant or any of the craft and souvenir shops nearby.
The place just needs an upgrade as far as the rooms are concerned and it would be great. The Internet is the big loser for this place, costing it another 2 stars!
- I have a USA Registered Motorcycle
- 100% Owned by Myself (No Loan)
- 3 Copies Australian Passport (+Original)
- 3 Copies Title (+Original – If you do not own, get letter from owner)
- 3 Copies Registration (+Original)
- 3 Copies Drivers Licence (+Original)
- Vehicle Import Permit + Copy
Leaving Bolivia
- As you approach the border, you will go through the tiny town of Estación Avaroa, Bolivia, and it springs up on you quite quickly after a left turn.
- You should stop right outside yellow and black fence before the border and park your bike on the before the fence.
- Immediately to your right will be immigration building. Go inside and get stamped out and hand in your Bolivia tourist card and pay 15
Bolivianos. This was a quiet frontier crossing, there was only one person in immigration, and it only took 10 minutes. - Next, go to Aduana building (blue building on the other side of the road). There will be a security guy there, and he will ask a few questions (Spanish only), and you will wait in line until he calls you to go to his desk.
- This takes only a few minutes (if no-one else is there)
- Total Time was 15 minutes and 15 Bolivianos ($3 USD)
Entering Chile
- As you drive through gates out of Bolivia, you will need to ride about 2 miles to get to Chile Border Crossing.
- You need to stop at first at the big long building on the left.
It is confusing because it does say Aduana on the building, but stop there,
enter the building, and you will see a number of windows. Wait for someone to arrive. I parked right outside immigration a bit further down, where they had security - Once you get inside you will need to complete a tourist card to get stamped into the country
- You also get to say how long you will be in the country (I said 90 days as you weave in and out of Chile on your way to Patagonia and back to Buenos Aires). The girl was a complete ass and made my life miserable, but I just smiled and was nice.
- Now go back around to the front of the building and down about 50 meters to get your import permit (Aduana) where you parked the bike, give all pertinent papers and copies (passport photo page, title, registration, and drivers license, tourist card).
- The guy/girl enters all data into the computer, asks how long you are staying and completes a form
- After about another 10 minutes I got my import papers for 90 days
- Now they will inspect your vehicle – one of the few border crossings they do this on. After taking my bags apart, and another 10 minutes I was on my way – Now into Chile!
- Total Time was 90 minutes and $0 (it would have been quicker if two buses hadn’t arrived before me at immigration)
Notes: You have to get insurance, which can be purchased online for Bolivia, Chile, Argentina, Uruguay, Paraguay, and Brazil. You just need to send her all your vehicle details and which countries you want. Here are her details below (send her an email ) she will require.
Insurance for Motorbike Argentina, Chile, Bolivia, Uruguay, Paraguay, and Brazil
I can do an insurance of civil liability for the vehicle. It covers Argentina, Chile, Bolivia, Uruguay, Paraguay, and Brazil. To pass the insurance price, I need if you can send me a photo of the
vehicle
To get insurance, she needs the following information:
- First and Last Name
- Passport Number
- Date of Birth
- Period you need to be covered (days)
- Vehicle information: Brand, Model, Year, VIN Number, Registration number.
Gisela María Speiser
Av. Roque S. Peña 651 3*”56″
(1035) Capital Federal
Tel/Fax 0054 11 4326-3647/2611
Celular 11 15 4176-9382
gisela@speiserseguros.com.ar
www.speiserseguros.com.ar
Total Cost Both Borders: $4 USD (I am Australian Citizen)


